Pop Art
noun
1. an art movement that began in the U.S. in the 1950s and reached itspeak of activity in the 1960s, chose as its subject matter theanonymous, everyday, standardized, and banal iconography inAmerican life, as comic strips, billboards, commercial products, andcelebrity images, and dealt with them typically in such forms asoutsize commercially smooth paintings, mechanically reproducedsilkscreens, large-scale facsimiles, and soft sculptures. (from www.dictionary.com)
1. an art movement that began in the U.S. in the 1950s and reached itspeak of activity in the 1960s, chose as its subject matter theanonymous, everyday, standardized, and banal iconography inAmerican life, as comic strips, billboards, commercial products, andcelebrity images, and dealt with them typically in such forms asoutsize commercially smooth paintings, mechanically reproducedsilkscreens, large-scale facsimiles, and soft sculptures. (from www.dictionary.com)
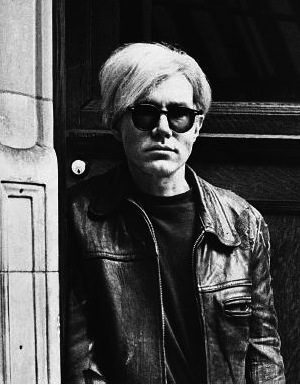
ANDY WARHOL - Major contributor to the Pop Art movement.
YOUR PROJECT: Create a monochromatic and pop art likeness of yourself or a famous artist (musician, artist, sports figure, etc)
STEP 1-Find your image
1. Do your research! Get a computer and do an image search for the following;
a) a self-portrait of your chosen human (from the shoulders up).
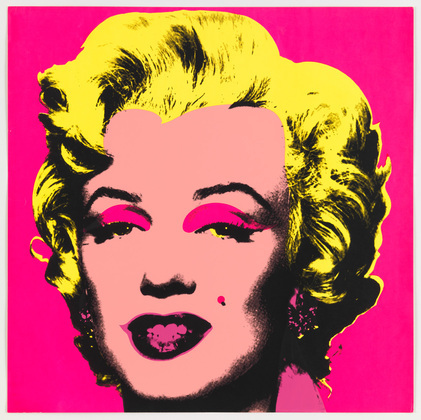
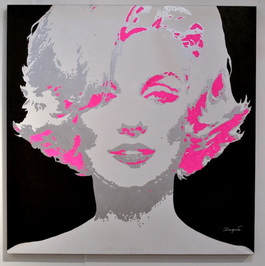
See the picture of Marilyn Monroe above (with the pink background)? This would be a perfect choice! When you have too much "stuff" in the picture, it becomes too busy, and it will make "seeing" your person very difficult.
When you pick a picture that has too much detail, it becomes much more complicated to work with - so keep
your job easier!
b) it MUST be a high-contrast image!
It is easiest to look for pictures that are already in grayscale, but if you are not able to find that, a color picture
can potentially work. (Ex: Google search "Marilyn Monroe self-portrait in grayscale")
1. Do your research! Get a computer and do an image search for the following;
a) a self-portrait of your chosen human (from the shoulders up).
See the picture of Marilyn Monroe above (with the pink background)? This would be a perfect choice! When you have too much "stuff" in the picture, it becomes too busy, and it will make "seeing" your person very difficult.
When you pick a picture that has too much detail, it becomes much more complicated to work with - so keep
your job easier!
b) it MUST be a high-contrast image!
It is easiest to look for pictures that are already in grayscale, but if you are not able to find that, a color picture
can potentially work. (Ex: Google search "Marilyn Monroe self-portrait in grayscale")
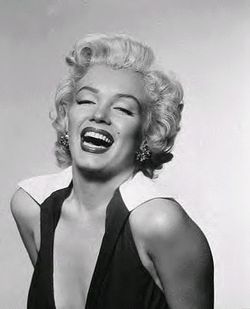
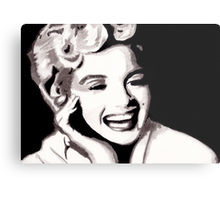
NOT A GOOD CHOICE
The image has too much going on - too much of her body is showing and the contrast between whites and blacks is very low. You want to see whites, blacks and grays when you look at the image.
The image has too much going on - too much of her body is showing and the contrast between whites and blacks is very low. You want to see whites, blacks and grays when you look at the image.
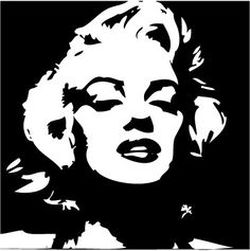
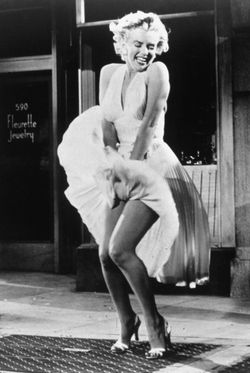
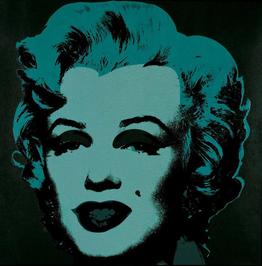
NOT A GOOD CHOICE
The image has too much contrast - no gray is present.
The image has too much contrast - no gray is present.
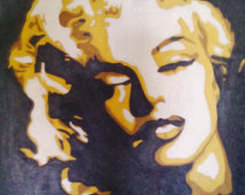
NOT A GOOD CHOICE
Too. Much. Going. On. Too much body, too much detail - not only would this take a long time,but the amount of work required to make it look decent is far more than you want to deal with right now!
Too. Much. Going. On. Too much body, too much detail - not only would this take a long time,but the amount of work required to make it look decent is far more than you want to deal with right now!
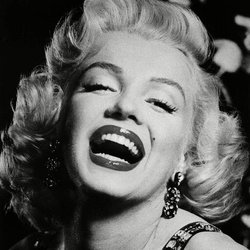
GOOD CHOICE!
The image is cropped well - it is from the top of the head to the top of the shoulders. There are many areas of white, gray, and black, which will make the work much less time consuming in the end.
The image is cropped well - it is from the top of the head to the top of the shoulders. There are many areas of white, gray, and black, which will make the work much less time consuming in the end.
After you have an image picked out, share it with me in a Google Doc ([email protected]) so that I can print and enlarge it.
STEP 2-Tracing
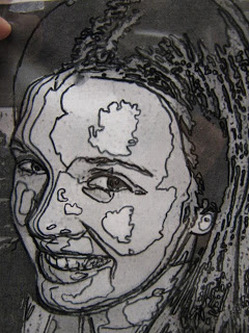
You will receive the image you sent to me via e-mail, and it will be much larger than when you gave it to me. The next step is to trace around all of the white, gray and black areas on the picture. You will want to do this with a dark or permanent marker. If you are not comfortable using either of those (remember, you can't erase marker), you can use a pencil until you get the hang of it, and then trace over that with a marker. When you are done, it will look something like this;
You will receive the image you sent to me via e-mail, and it will be much larger than when you gave it to me. The next step is to trace around all of the white, gray and black areas on the picture. You will want to do this with a dark or permanent marker. If you are not comfortable using either of those (remember, you can't erase marker), you can use a pencil until you get the hang of it, and then trace over that with a marker. When you are done, it will look something like this;
STEP 3 - Transfer
Next, you are required to transfer the traced areas to a new piece of paper. To do this, you will do the following steps;
1) Get a piece of white 12 x 18 construction paper.
2) Put the construction paper on top of the traced image, and tape together (it may be easiest to tape it from the back) with painter's tape (this is important!), so that it will come off when you are done.
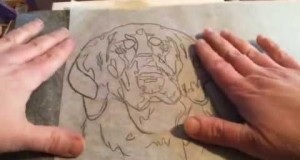
3) Find a light source. In our room, we have light projectors that you can use (just ask), but if those are all in use, you can also put your papers up to the window and the natural light will allow you to trace from one paper to the next. This is an example of what the process will look like;
Next, you are required to transfer the traced areas to a new piece of paper. To do this, you will do the following steps;
1) Get a piece of white 12 x 18 construction paper.
2) Put the construction paper on top of the traced image, and tape together (it may be easiest to tape it from the back) with painter's tape (this is important!), so that it will come off when you are done.
3) Find a light source. In our room, we have light projectors that you can use (just ask), but if those are all in use, you can also put your papers up to the window and the natural light will allow you to trace from one paper to the next. This is an example of what the process will look like;
4) You will do this a second time, so you will have 2 copies of the same image on two separate pieces of paper.
STEP 4 - Monochromatic Painting
On one of your papers you will use a monochromatic (we will be using black, grey and white) color scheme. You will need your original image to reference for this process.
Look at your original image. You should see 3 different shades - light, medium, and dark.
You will paint all of the dark shades black, all of the medium shades grey, and all of the light shades white.
When you are done, you will have a portrait that has similar shades to the one to the left (remember, though, that the image will be whomever you chose).
We are using acrylic paint, so remember to be careful, because it is permanent and will not come out of clothes (there are aprons available if you want to wear one).
STEP 5 - Pop Art Painting with Color!
Now it's time for you to choose! Pick three colors to use for your second painting. Keep color in mind - bright colors will make it feel exciting, dark colors will make it feel foreboding, sad, or somber. Complimentary colors will cause it to pop, warm colors will make it feel energetic, cool colors will cause the viewer to feel calm or peaceful.
Check out these examples!
|
|
STEP 6 - Put your name on it!
Use a pencil/colored pencil/pen to write your name on the back of each paper. DO NOT USE A PERMANENT MARKER!
Once you have put your name on it, you may turn it in.
Use a pencil/colored pencil/pen to write your name on the back of each paper. DO NOT USE A PERMANENT MARKER!
Once you have put your name on it, you may turn it in.
